The Ultimate QR Code Guide for Creating Free QR Codes

This is the ultimate QR code guide you need that’s packed with the best tips and suggestions when creating QR codes for free.
With millions of mobile users worldwide, businesses are now using mobile-friendly tools that consumers are likely to engage with to bring results to their marketing campaigns such as QR codes.
This technology became widely popular during the global health crisis, as it played an important role in contactless transactions.
As the number of mobile users continues to grow, so is scanning QR codes. In the United States alone, it is estimated that over 100 million mobile users will continue to scan them.
Free QR Code Generator guides you on how to create personalized QR codes for your various needs from start to finish. Find out more in this blog.
- Barcodes vs. QR codes: What’s the difference between the two?
- Types of QR codes you should know about
- How do I create my own QR code for free?
- QR code guide for scanning QR codes
- Tips on how to properly design your custom QR code
- QR code guide for effective QR code usage
- Why use Free QR Code Generator to create your QR codes?
- Start your journey with QR codes today
- Frequently asked questions
Barcodes vs. QR codes: What’s the difference between the two?
 You might have encountered a QR code during your run to the grocery store and scanned one or two of them on product packaging and discount posters.
 But what is a QR code and how does it differ from the barcode we know?
While both serve the purpose of encoding information, QR codes and barcodes actually differ significantly in form and in their capacity to store data. Take a look at the comparison below:
What are barcodes and how do they work?
Just like the name suggests, barcodes consist of a series of parallel lines of varying widths and spacings arranged in a linear or bar manner. They are often accompanied by numbers found at the bottom of the lines.
Each of these patterns represents a different alphanumeric character or numeric sequence, typically around 20-25 characters.
You can commonly find this printed on retail products, which you can scan at price checkers and point of sale (POS) for product identification and pricing during transactions.
| Advantages | Disadvantages |
| Quick data entry Inexpensive to create Easy integration into software systems (e.g., point of sale (POS) systems and enterprise resource planning (ERP) systems | Limited data capacity It can only be scanned in a horizontal manner Easily faded, making it unreadable Does not have security features |
How do QR codes work in comparison to barcodes?
Meanwhile, Quick Response (QR) codes are square, two-dimensional matrix patterns that typically consist of black squares on a white background.
They have been standardized by the International Organization for Standardization under ISO/IEC 18004.
Unlike barcodes, QR codes can store information in both the horizontal and vertical dimensions, allowing for significantly greater data capacity.
You can store URLs, texts, multimedia content, and link maps and create business cards out of them.
They are also customizable, allowing you to change their colors, add a logo, and encryption for added protection on their content.
| Advantages | Disadvantages |
| High data capacity It can be customized to match a brand Scannable using smartphones Inexpensive to make It can be encrypted with a password Has an error correction feature | Cannot be scanned using older mobile device models |
Between barcodes and QR codes, the latter are much more durable and can store more data, which makes them highly in demand in different industries today, especially in information dissemination, marketing, and inventory.
Types of QR codes you should know about
 Did you know that there are two kinds of QR codes? While they might look the same, there are actually some distinctions between static and dynamic QR codes that users often fail to recognize.
 We have included in this QR code guide a static versus dynamic QR code comparison to help you distinguish which of the two is best to use for particular situations.
Static QR code
Unchanging or fixed, that’s what static QR codes are. Just like the typical QR codes, you can store any information in them, such as website links, texts, and event details.
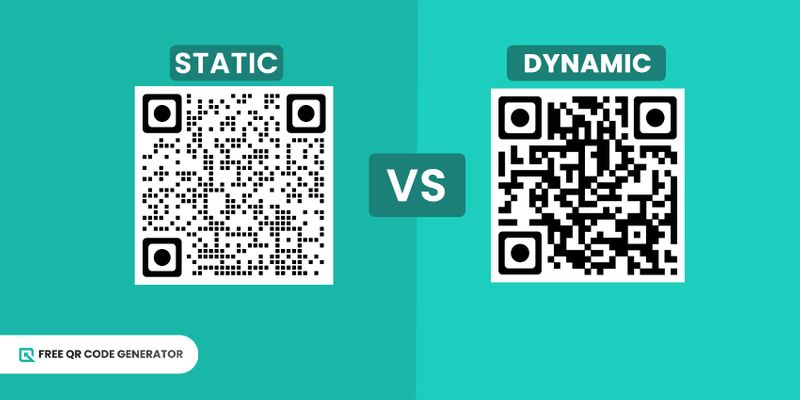
If you compare them to dynamic QR codes, static ones appear to have much denser patterns.
Since static QR codes are free, you cannot change the information they contain once they are generated.
Still, these free QR codes do not expire and can last forever unless the content it links to becomes unavailable or the QR codes themselves become unusable.
You can use this type of QR code when you do not need to change the information frequently, like one-time-only marketing campaigns or basic presentation of product details.
Dynamic QR code
On the other hand, dynamic QR codes are more advanced QR codes because you can edit and redirect them to other content even after generating and printing them.
Appearance-wise, they are less dense compared to static QR codes as they require less space available for encoding user-visible data.
They also have higher correction levels. This means that users can still scan and access the content, even if the QR code is damaged or slightly scratched
While this requires you to avail of a subscription, investing in dynamic QR codes is beneficial for your business, especially if you intend to use the same QR code for different campaigns.
How do I create my own QR code for free?
Now that you have an idea of the basics of QR codes, it’s time you learn how to create one without the need to install any software on your device.
Follow this step-by-step process to make a free QR code using our web-based QR code maker:
1. Go to Free QR Code Generator by clicking the link.
2. Use a QR code solution of your choice.
3. Enter the data you want to convert.
4. Generate the QR code.
5. Change the design using the customization tools: color, eyes, frame, logo, and pattern.
6. Scan the QR code to test if it’s working.
7. Download in PNG for digital use or SVG for prints, integrate it on different materials, and deploy.
QR code guide for scanning QR codes
 While QR codes are being widely used by businesses in different industries, many consumers have yet to understand what to do with them when they see one.
 If you’re curious as to how you can access the content of a QR code you’ve seen on a poster or packaging, we got you. In this guide, we’ll walk you through how to scan it using QR scanners on different mobile devices.
On Android devices
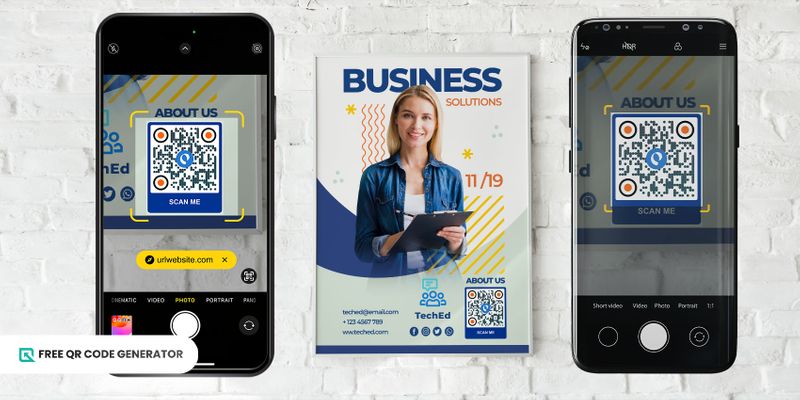
1. Open a QR code scanner app available on your device: camera app, Google Lens, or browser.
2. Point the camera towards the QR code image. Make sure that it is well-lit for better scanning.
3. Click the pop-up link on your screen or wait for the scanner to redirect you to its content.
On iOS devices
1. Open your camera app.
2. Steadily position your camera towards the QR code. Maintain the right distance when scanning.
3. Tap the notification banner to open the content.
Using third-party scanners
1. Download a reliable QR code scanner app on your device.
2. Open and focus the camera viewfinder towards the QR code.
3. Wait for the scanner to recognize the QR code and redirect you to the content.
Tips on how to properly design your custom QR code
When designing your QR codes, you need to have the right methods to ensure they are visually appealing, effective, and, most importantly, functional.
We recommend these QR code design tips that can help you customize your QR codes correctly.
Use your brand colors
Colors are an essential part of your brand identity.
Use your business’s color scheme to customize the appearance of your QR codes, taking them a step further from those familiar and sometimes dull black-and-white squares.
Make sure that there is enough contrast between the foreground and background colors to make the QR code scannable.
Add your business logo
Incorporating your brand’s logo into the QR code makes it easily recognizable to others, with it serving as proof that the QR code is designed for your business and is legitimate.
By using a QR code with logo on your marketing campaigns and packaging, you can increase people’s willingness to engage with it.
Change the eye shape and patterns
The eye shape and patterns of your QR code play a major role in its functionality, but that doesn’t mean you cannot customize them.
Don’t be afraid to change the eye shape and pattern design of your QR code to make it more visually appealing.
The unique eye shapes and patterns can pique curiosity and encourage users to scan the QR code.
QR code guide for effective QR code usage
 QR codes offer an effective way for you to connect with your audience and drive conversions. But just like any marketing strategy, the effectiveness of QR codes depends on how well you implement them.
 Here are five essential steps you should not forget when using QR codes in marketing campaigns.
Link it to valuable content
Value is the cornerstone of successful QR code campaigns.
Before plastering QR codes everywhere, ask yourself: what’s in it for your audience?
Offer something enticing through the QR codes to increase the chances of your target market engaging with your campaign.
Also, make sure only to link your QR codes to legitimate website pages to prevent users from encountering a QR code scam or quishing (QR code phishing) online.
Maintain a proper QR code design and size
Attention to detail also makes all the difference between a campaign that falls flat and one that soars to success.
This holds especially true when it comes to designing your QR codes. Instead of just using black and white, you can infuse your QR codes with your brand’s personality, such as color and logo.
Also, size matters. No matter how visually stunning your custom QR code may be, it serves no purpose if users can’t spot and scan it easily.
That’s why it’s important to maintain a minimum QR code size of 2×2 cm or larger when integrating them into your marketing materials.
Promote it on various channels
Lastly, the success of QR code campaigns hinges on their visibility.
Make sure to place your QR codes in high-traffic areas where your target audience likely encounters them, such as in packaging, billboards, and social media posts.
It should always be part of your goal to make it effortless for users to spot and scan your QR codes.
Why use Free QR Code Generator to create your QR codes?
A reliable QR code software plays a crucial role when it comes to the customization of your QR codes, especially if you want them to be functional and branded at the same time.
What are the perks of using our QR code maker platform that can help you transform your black-and-white QR code into something that truly reflects your brand personality?
Free and user-friendly
As the name suggests, you can generate a free QR code using our web-based QR code maker platform.
No need to download anything on your device as you can use it as it is on your browser. It’s easy and free to use.
If you want a more advanced experience, you can sign up for a free account and enjoy using three dynamic QR codes with a 500 scan limit each without any charges.
You also don’t need to provide any credit card details. It’s completely free!
Safe to use
One of the lesser-known perks of this platform prioritizes privacy and security, making it safe to use.
It neither requires you to provide personal information, such as your credit card details nor does it inject malicious content or pop-up ads while you’re creating a QR code on the website.
With this, you have nothing to worry about your personal data being leaked or your device getting a virus when you download the QR code image.
Wide selection of QR code solutions
We understand the diverse needs of users, which is why we offer a comprehensive range of QR code solutions.
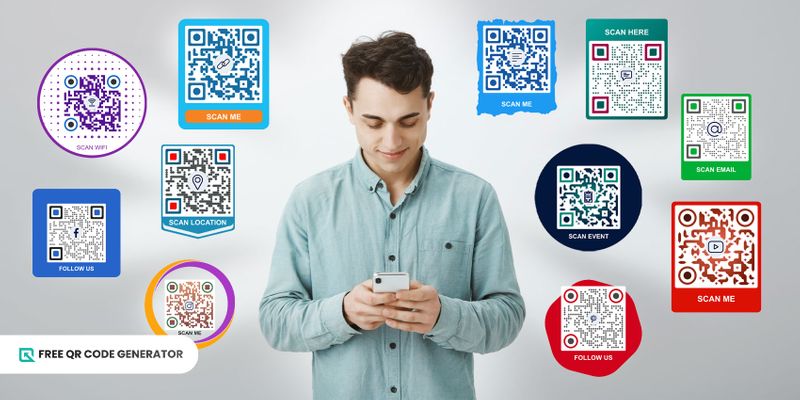
There’s a total of 20 QR code solutions available on the platform, from the simplest to the most advanced ones.
- URL QR code
- Text QR code
- SMS QR code
- WiFi QR code
- Event QR code
- Location QR code
- Email QR code
- Facebook QR code
- YouTube QR code
- Instagram QR code
- Pinterest QR code
- vCard QR code
- Social media QR code
- File QR code
- App stores QR code
- Menu QR code
- Google Form QR code
- MP3 QR code
- HTML QR code
- Multi-URL QR code
Customization options
We don’t stop with the QR code solutions. Our QR code software also offers customization tools that you can use to customize QR code designs.
You can choose colors and add a logo to make your QR codes reflect the style and identity of your business.
With this, you no longer need to settle for a dull-looking QR code and make it stand out to drive more people to your campaigns.
Comprehensive guides and tips
No need to fumble around on your own to find answers to questions about how do QR codes work and what are the best practices for using them as we offer comprehensive discussions and tips to guide you every step of the way.
Whether you’re a small startup or a multinational corporation, you’ll find something valuable in our comprehensive resources, equipping you with knowledge of the workings of QR code technology.
Start your journey with QR codes today
Now that you have reached the end of this QR code guide for creating QR codes for free, we hope that you’ll be well-equipped with our tools and insights to explore more of this technology’s potential with confidence and ease.
If you’re a business owner seeking innovative marketing solutions or simply someone intrigued about QR codes, our user-friendly platform and comprehensive resources are always at your disposal.
Create and use QR codes like a pro in no time. Visit the Free QR Code Generator and begin your journey towards convenience.
Frequently asked questions
Is it free to create a QR code?
Yes. Especially if you use our QR code software, you can make your own QR code effortlessly and at no cost.
You can use it as it is or sign up for a free account for more advanced perks—no credit card required!
Do QR codes expire?
QR codes do not inherently expire unless the content they are linked to becomes inaccessible or the QR code itself is damaged. Static QR codes, in particular, work like that.
But for dynamic QR codes, you can set them to expire to fit a specific campaign, for instance.
As long as the service remains active and the content is maintained, dynamic QR codes also remain functional indefinitely.
